
Ready to start selling? Submitting your seller application only takes a few minutes, and most sellers get access right away.
This guide covers who can apply and how to complete your application in the app.
Before you apply
Check eligibility
Most sellers can apply as long as they meet these requirements:
You live in a country where selling on Whatnot is supported
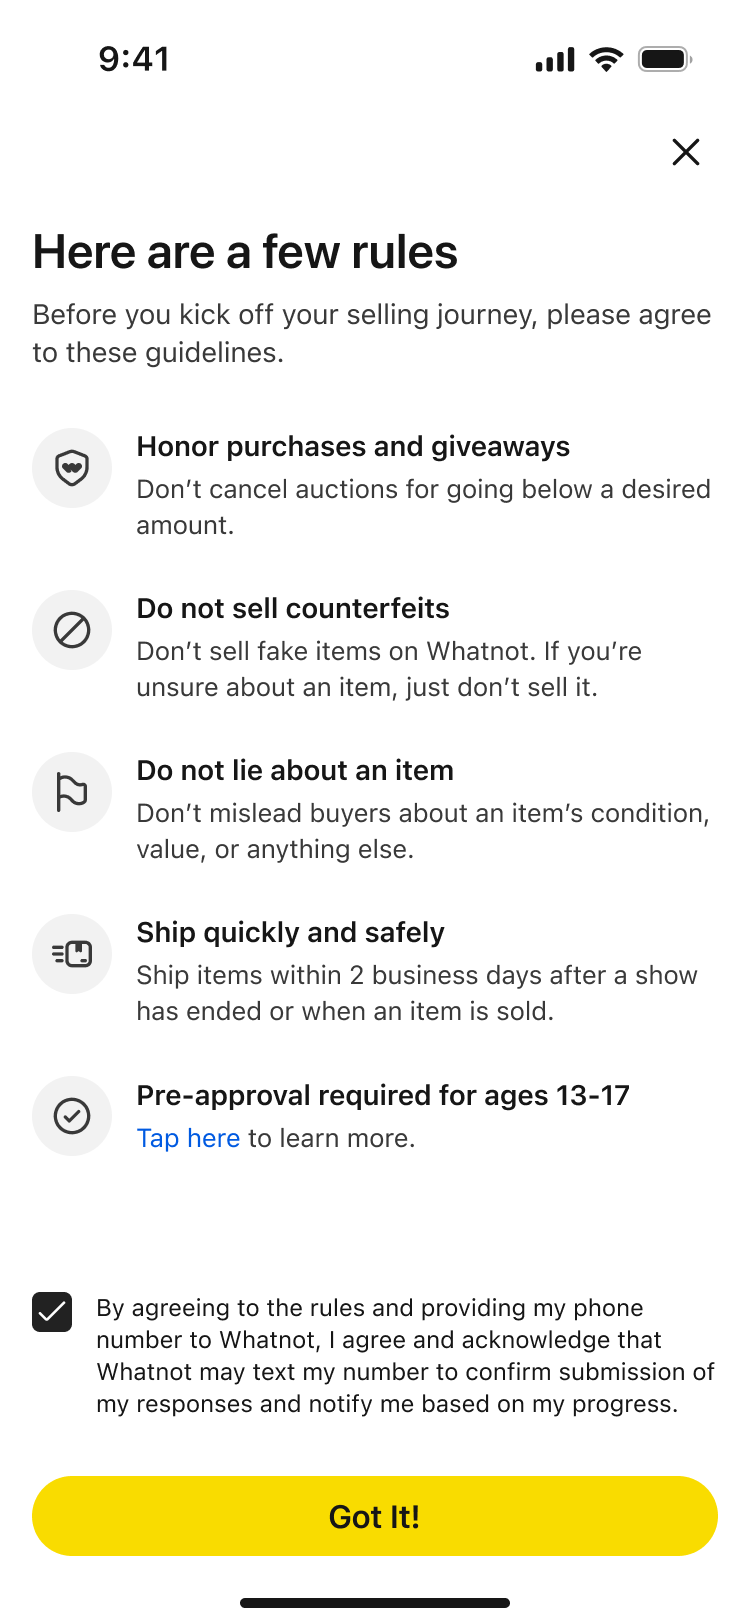
You’re at least 13 years old
If you’re 13–17, you’ll need a parent or guardian’s permission and must complete a special application.
Learn more about teens on Whatnot.
Selling in gated categories
Some categories require additional approval after you’re granted seller access.
These include:
Luxury Bags & Accessories
Surprise Sets in Sneakers & Streetwear
Wholesale
If you plan to sell in one of these categories, we may request additional information or requirements.
Learn more about selling in gated categories.
Complete your seller application
1. Start your seller application
Open the Whatnot app.
Tap + Sell at the bottom of the screen.
Tap Get Started.
You’ll answer a short series of questions about your experience and selling plans.
2. Agree To Whatnot's Guidelines
Review and agree to our Community Guidelines to help keep Whatnot safe and fun for everyone.
3. Choose your main seller category
Select the category you plan to sell in most often.
You can sell in multiple categories later. For now, choose your primary category. Depending on your selection, you may also choose a subcategory.
4. Tell us about your selling experience
Select the option that best describes your experience level.
Whether you’re brand new or already selling elsewhere, just choose what fits best.
This helps us understand how to support you.
5. Share your monthly sales revenue
If you already sell online or in person, enter your typical monthly revenue.
If you’re new to selling, select the option that best matches your situation.
6. Tell us where else you've sold
Select any platforms or marketplaces where you currently sell, either online or in person.
This helps us tailor your seller experience.
7. Add your social media links
If you promote or sell through social media, enter your platform names and links.
Double-check that your links are accurate before continuing.
8. Enter your return address
Enter your full legal name exactly as it appears on your government-issued ID.
After you’re approved, you can update your name and return address in Seller Hub if you prefer to use a business name or alias. You may also use a PO Box, as long as the name field contains at least 2 characters.
9. Submit your application
In most cases, you’ll unlock seller access within minutes. If additional review is needed, we’ll notify you with next steps.
Once approved, follow the in-app checklist to schedule your first show.
Need more help? Learn how to start selling on Whatnot.
Was this article helpful?
Thanks for your feedback!
Articles in this section
- Start selling on Whatnot
- Apply to sell on Whatnot
- Seller location & currency requirements
- New seller guide to listing products
- Shipping checklist for new sellers
- The New Seller Sales Match Bonus
- The Rising, Power, and Super Seller Bonuses
- Practice going live with Rehearsal Mode
- Whatnot Affiliate Program